Categories
Technology

Default Values in Vapor Fluent

My recent tinkering has been with Vapor, and while I mostly like their Fluent ORM, it has some rough edges and semi-undocumented behavior. At some point, I’ll feel confident enough in what I’ve learned through trial and error (combined with reading the source code – open source!) to actually make some contributions to the documentation, but for now, I’m going to throw some of the things I struggled with up here.

If you’re using a migration to add a column, and specifically want it to be non-null, you’ll need a default value. My first approach was to do a three-step migration, adding the column as nullable, then filling the default value on all rows, and then setting the column to be non-null, but that didn’t feel right. Eventually, though, I figured out how to express a DEFAULT constraint in Fluent:

let defaultValueConstraint = SQLColumnConstraintAlgorithm.default(/* your default value here */)

Then, in your actual schema builder call:

.field("column_name", /* your type */, .sql(defaultValueConstraint), .required)

Note that SQLColumnConstraintAlgorithm isn’t available from the Fluent module, you’ll need to import SQLKit first.

And here, a full worked example:

import Vapor
import Fluent
import SQLKit

struct DemoMigration: Migration {
    func prepare(on database: Database) -> EventLoopFuture<Void> {
        let defaultValueConstraint = SQLColumnConstraintAlgorithm.default(false)
        return database.schema(DemoModel.schema)
            .field(DemoModel.FieldKeys.hasBeenTouched, .bool, .sql(defaultValueConstraint), .required)
            .update()
    }
    
    func revert(on database: Database) -> EventLoopFuture<Void> {
        database.schema(DemoModel.schema)
            .deleteField(DemoModel.FieldKeys.hasBeenTouched)
            .update()
    }
}

(For context, I’m in the habit of having a static var schema: String { "demo_model" } and a struct FieldKeys { static var hasBeenTouched: FieldKey { "has_been_touched" } } within each of my Fluent models – it keeps everything nice and organized, and avoids having stringly-typed issues all over the place.)
Categories
Education Portfolio Technology

Swift Student Challenge

A few days ago, Apple announced the winners of their Swift Student Challenge. I had applied and used my “taking a test” tactic, which was to hit ‘submit’ and then promptly erase the whole thing from my brain. (What’s done is done, and I feel silly worrying about something I have no control over.)

So when I got the email that “my status was updated” it was a bit of a surprise.

And when I clicked through the link (because, of course, they can’t just say in the email, you have to sign in) I was in for more of a surprise.

My submission had been accepted. I’m one of 350 students around the world whose work sufficiently impressed the judges at Apple.

Screenshot from Apple Developer website. It reads: Congratulations! Your submission has been selected for a WWDC20 Swift Student Challenge award. You'll receive an exclusive WWDC20 jacket and pin set at the mailing address you provided on your submission form. You'll also be able to download pre-release software, request lab appointments, and connect with Apple engineers over WWDC20 content on the forums. In addition, one year of individual membership in the Apple Developer Program will be assigned free of charge to eligible accounts of recipients who have reached the age of majority in their region. For details, see the WWDC20 Swift Student Challenge Terms and Conditions.
Neat!

Now, throughout the whole process of applying, I was my usual secretive self. I think two people knew that I was applying at all, much less what I was working on. Since it’s over with, though, it’s time for the unveiling.

What I made

I wanted to bring back a concept I’ve played with before: cellular automata. A few days before the competition was announced, I’d seen a video that really caught my interest.

Well hey, I thought, I’ve got some code for running cellular automata. I want to learn Swift Playgrounds. And I’ve been having fun with SwiftUI. Let’s combine those things, shall we?

The first big change was a visual history; when a cell dies, I don’t want it to just go out, I want it to fade slowly, leaving behind a trail of where the automata have spread.

The second was rewriting all the visuals in SwiftUI, which was a fun project. Animation timings took me a bit to get right, as did figuring out how to do an automated ‘update n times a second’ in Combine. The biggest issue I had, actually, was performance – I had to do some fun little tricks to get it to run smoothly. (Note the .drawingGroup() here – that made a big difference.)

And third, I didn’t want it to just be “here’s some code, look how pretty,” I wanted to actually use the Playground format to show some cool stuff. This turned out to be the most frustrating part of the whole thing – the Swift Playgrounds app doesn’t actually support creating a PlaygroundBook, and the Xcode template wasn’t supported in the then-current version of Xcode.

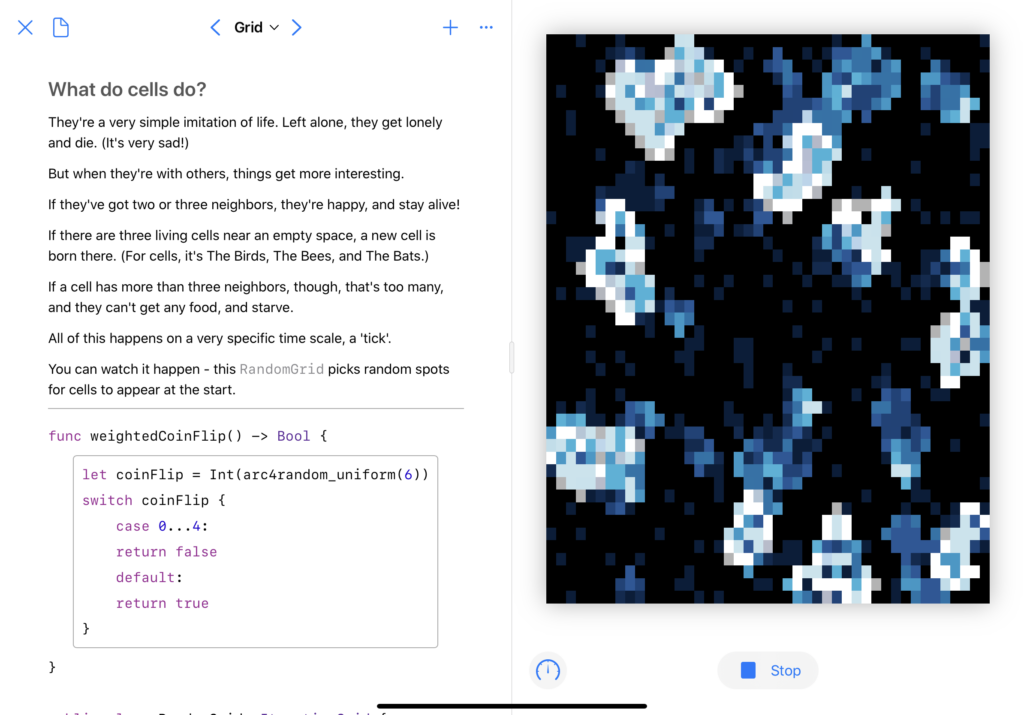
But the end result? Oh, I’m quite happy with it. PlaygroundBooks are cool once you get past how un-documented they are. You can, to borrow a Jupyter turn of phrase, mix code and prose in a lovely, interactive way.

Screenshot of the 'Grid' page of the playground book.  The full text is at https://github.com/grey280/SwiftLife/blob/master/Swift%20Student%20Submission.playgroundbook/Contents/Chapters/Chapter1.playgroundchapter/Pages/Grid.playgroundpage/main.swift
Don’t worry, the real version (and some videos) are below.

Doing the actual writing was pretty fun. This is a concept I’ve spent a lot of time learning about, just because it captured my interest, and I wanted to share that in a fun way.

Overall, I’m quite happy with the result. If you’d like to see more, I’ve made recordings of the ‘randomized grid’ and ‘Wolfram rule’ pages running, and the actual playground is available on GitHub.

Categories
Technology

Reversi: A Postmortem

Spring quarter consisted of two things: beginning the internship, and an “intro to programming” course. Which, at first glance, seems like it would’ve been a “coast to an easy A” kind of thing for me, but that wasn’t my goal. And, to quote the Dean of UCI’s Graduate Division, “grad school is for you.”

So, at the start of the quarter, I sat down to figure out what my goals for this class would be, and came up with two things. The first, which I won’t be writing about, was to get a bit more teaching experience – in the vein of “guiding people to asking the right questions,” rather than just showing them the answers.

Second, and the topic of this post, was that I wanted to learn Vapor. The professor was kind enough to let me do this – instead of doing the course project (an online game of Reversi) in Node, I did it in Vapor.

As a learning exercise, I’d say it was… okay.

What Went Well

I love Swift as a language. The type system just fits in my head, it aligns incredibly well with how I think.

In this case, that meant representing all the events to the server, and the responses from the server, as enums.

It also meant that I could have a solid Game class that represented the whole game board, with some neat logic, like getters that calculate the current score and if the game has ended. Pair those with a custom Codable implementation, and you’ve moved the majority of the logic to the server.

… and What Didn’t

The fact that I’m representing events to and from the server as enums, instead of using Vapor’s routing system, was a result of tacking on another thing I wanted to learn about, and trying to loosely hew to the nominal course objectives. The official version of the project used WebSockets for all the communication. Vapor supports WebSockets. Great combo, right?

Well, sure, but it meant I did almost nothing with the actual routing. Instead I re-implemented a lot of it by hand, and not in a very clean way. Vapor doesn’t scope things the way I expected – based on some experimentation, it instantiates a single copy of your controller class and reuses it, rather than having one per connection. So instead of having nice class-level storage of variables, and splitting everything up into functions with the main one handling routing, it all wound up crammed into the main function. Just so I could maintain the proper scope on variables. I’m still not happy about it.

What’s Next

I’d like to keep tinkering with Vapor. When I’ve got the time, I have a project in mind where it seems like a good fit.

In the meantime, I hope their documentation improves a lot. The docs they have are good tutorials, and cover their material well; they also, it feels like, leave out the lion’s share of the actual framework. By the end of the project, I’d given up on the docs and was just skimming through the source code on GitHub, trying to find the implementation of whatever I was trying to work with. (This, by the way, doesn’t work with Leaf, the templating engine – the docs are basically nonexistent, and the code is abstracted enough that you can’t really skim it, either.)

Complaints aside, I still like Vapor. I picked up a book on the framework, which seems like a pretty good reference on the topic.

And hey, it was a neat little project. (The JavaScript is a disorganized mess, but it’s also aggressively vanilla – while the rest of the class was learning about NPM, I decided to see how far I could get with no JS dependencies whatsoever. Answer: very.) Check it out, if you’d like:

Categories
Programming Tools

Playlister

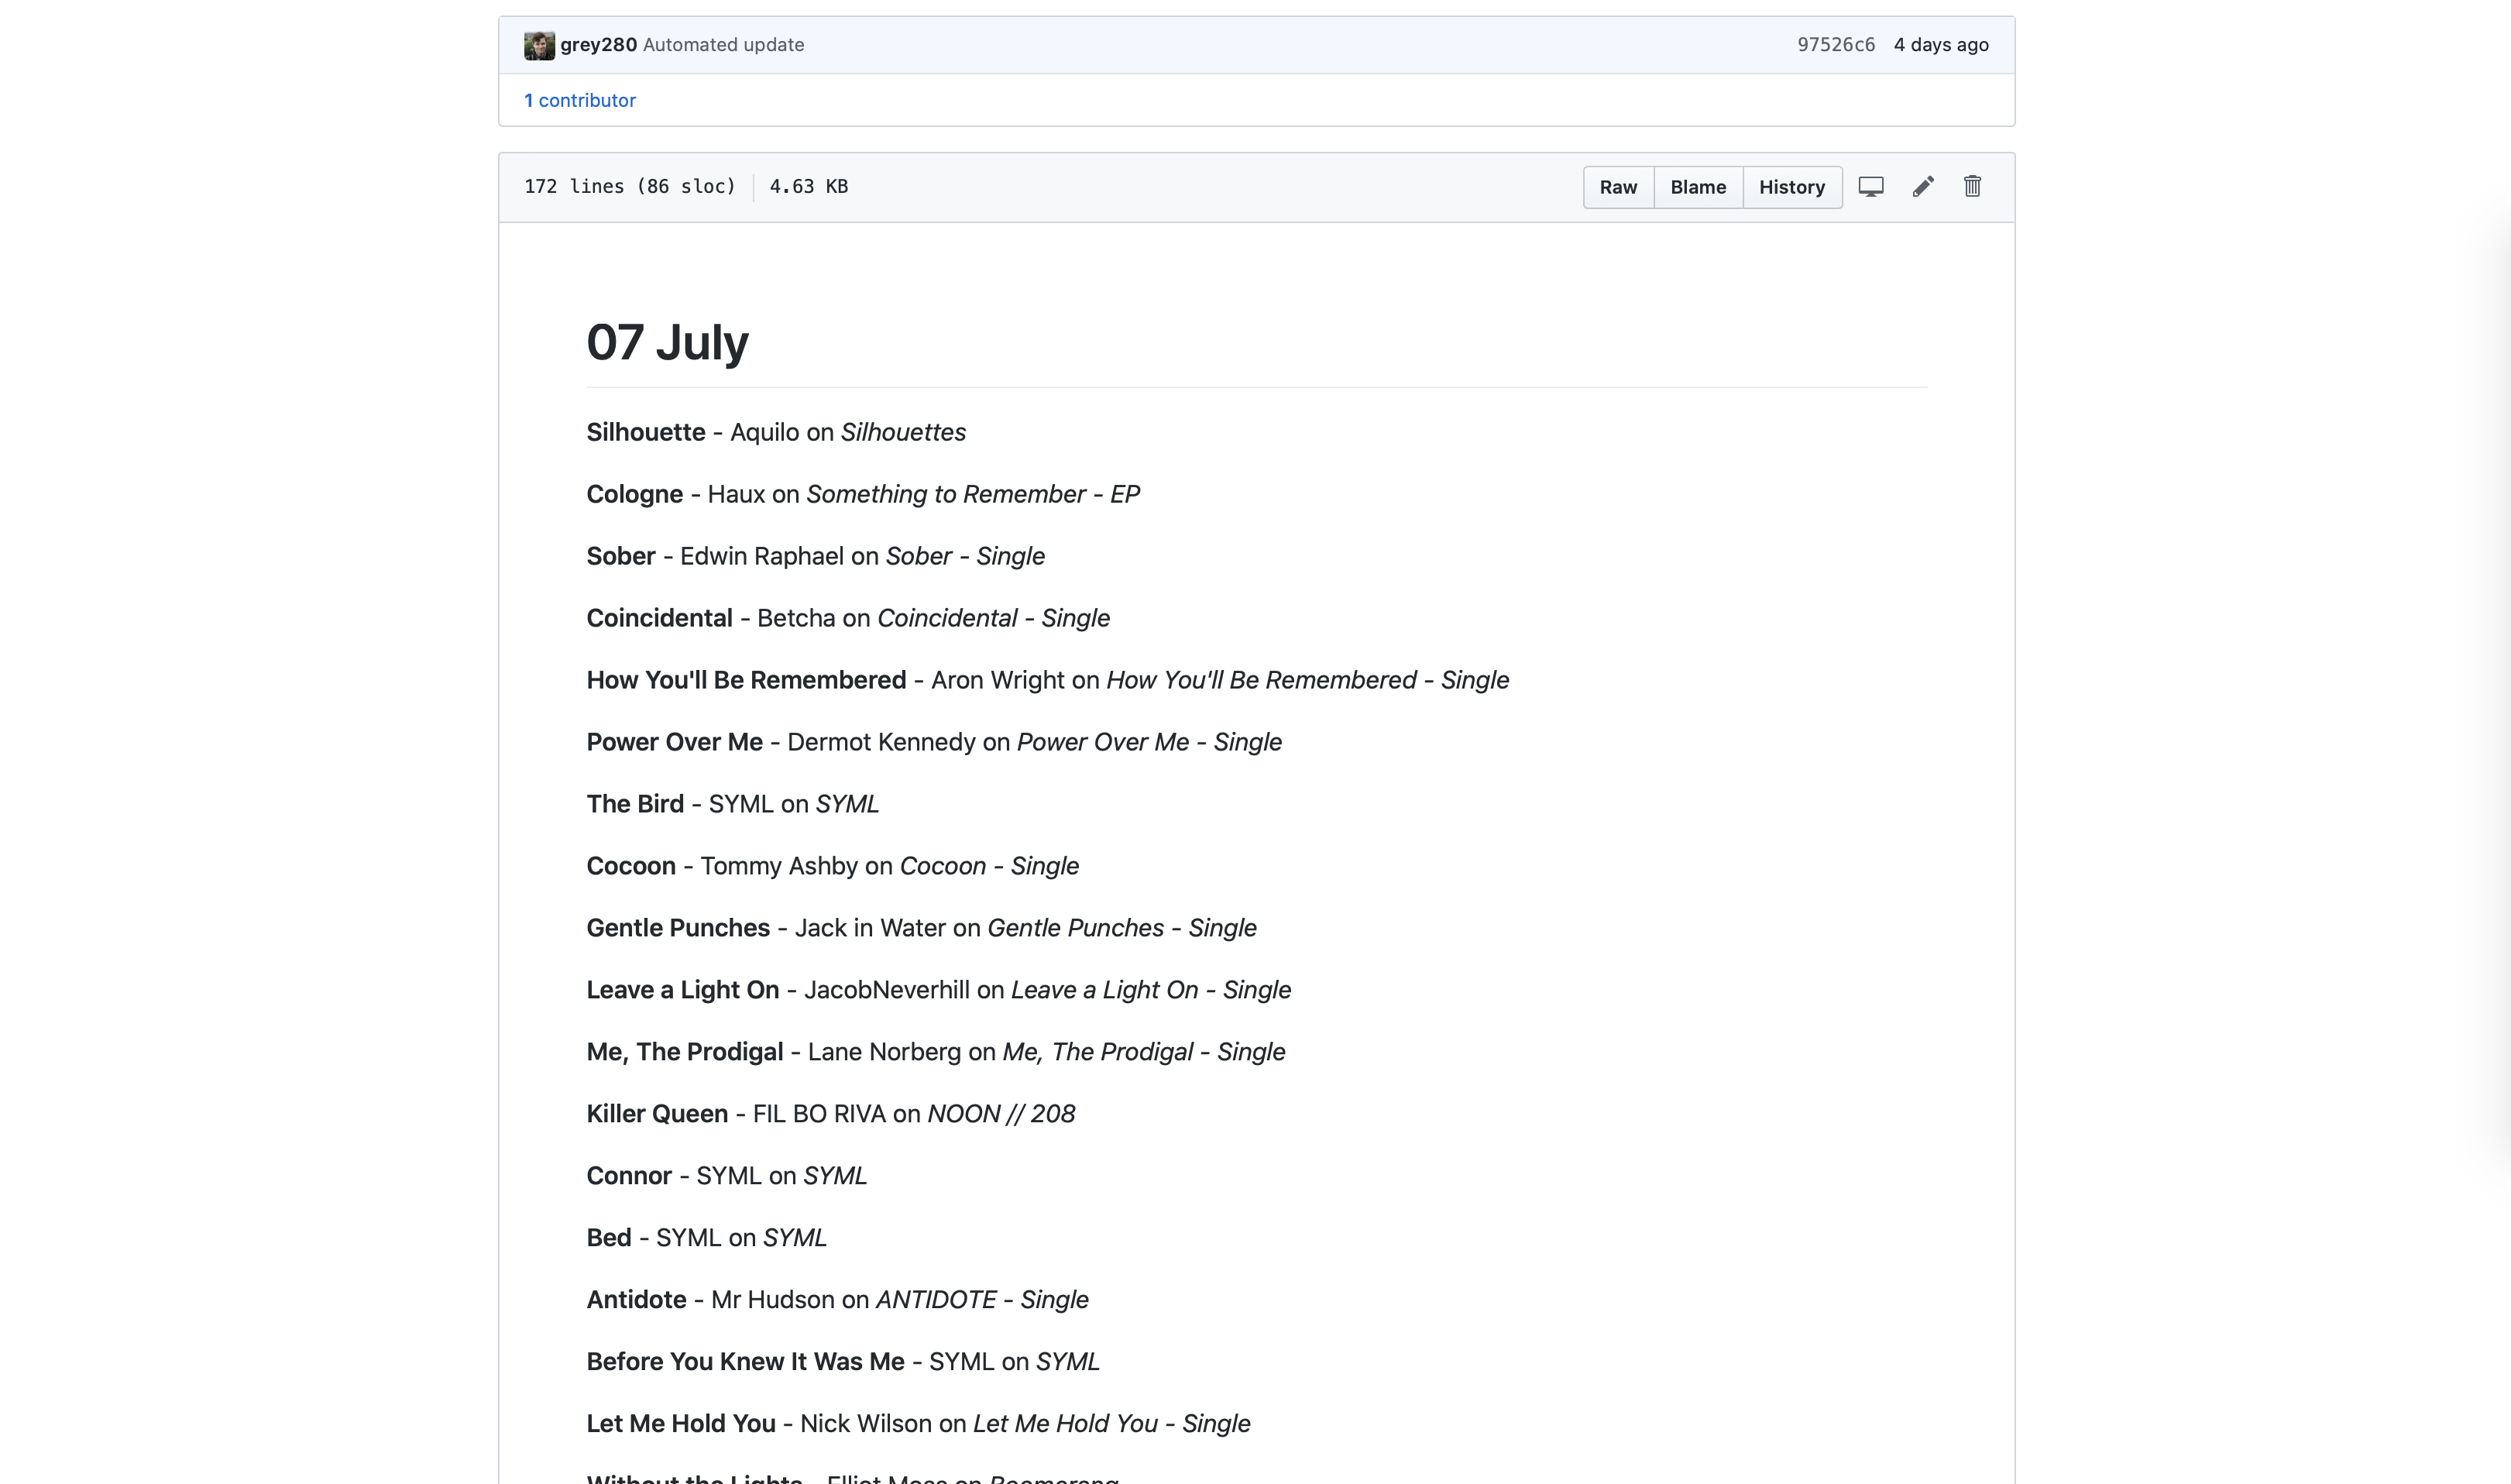
In the past couple months, I’ve had an ongoing series on converting iTunes playlists to text files, with a brief digression into scripting with Swift. While I doubt that I’m entirely done with the topic, I have reached a point where I’m ready enough to do another write-up.
This morning, I made playlister available to the public. It is not a consumer-facing application like my others; it is very much a tool for people who are comfortable with the command line.
In between the previous iteration of this tool and the current, I actually had a version of playlister built and shareable (Chase has that version installed on his Mac, actually) but, before releasing it to the public, I looked at the code and thought “I can do better.”1
So I buckled down and spent some time indulging in my love for API design, and tried some tricks I’ve been wanting to try.
The rewritten version ships with a library, LibPlaylister, that provides the basic ideas — protocols that allow for interacting with the library, playlists, and tracks; conversion to Markdown — as well as some neat new tricks. There’s some hooks for customization, such as the RatingFormatter protocol, and included FiveStarRatingFormatter, and the new LinkStore protocol, which provides a layer of abstraction on the SQLite-based caching of links.2
It was also an excuse to add to my Swift toolbox. I worked with SwiftCLI for a while, and then converted to ArgumentParser when that was released. I’ve done file interactions, and a lightweight database. I’ve learned a lot about Swift Package Manager.3 I learned a bit about XCTest, and figured out how to get it working in GitHub Actions. (And, more interestingly, figured out how to conditionally include frameworks in an SPM package. I wanted the tests running on Linux, but Linux… doesn’t have the iTunesLibrary framework, shockingly.)
I had fun building this, and will probably continue to tweak it. (I mean, it could be fun to get it automatically pulling links from the iTunes Search API, and just asking ‘is this the right link?’ instead of requiring manual entry.4)
For now, though, it’s ready enough to share, and made for a fun write-up and a good way to de-stress by tinkering.


  1. Interesting aside from giving that to Chase: Did you know that macOS has a ‘quarantine’ flag it puts on executables sent via AirDrop? That was some fun googling to figure out. The solution: xattr -d com.apple.quarantine ./playlister 
  2. That caching is definitely the biggest productivity gain of this, as compared to the previous version — now, when I go to write up my monthly playlist, the whole first part of the playlist doesn’t require any interaction at all. 
  3. Coming from working with nom’s package.json format at work, SPM Package.swift files are nice. Like, you can have comments in them! And, more, you can have actual code, so you can do neat stuff like this
  4. Although, at that point, I’d probably wind up writing it up as a SwiftUI app so I can show images. Which… might have been part of the inspiration for making LibPlaylister a separate library. 
Categories
Programming

SwiftUI’s Picker

I’m very excited about SwiftUI, and have been using what little free time I have to do some tinkering with it. I started during the beta period, which was fun in between being very frustrating; a lovely side effect was that some of the knowledge I picked up is… entirely wrong. One that caught me was the implementation details for the Picker type.
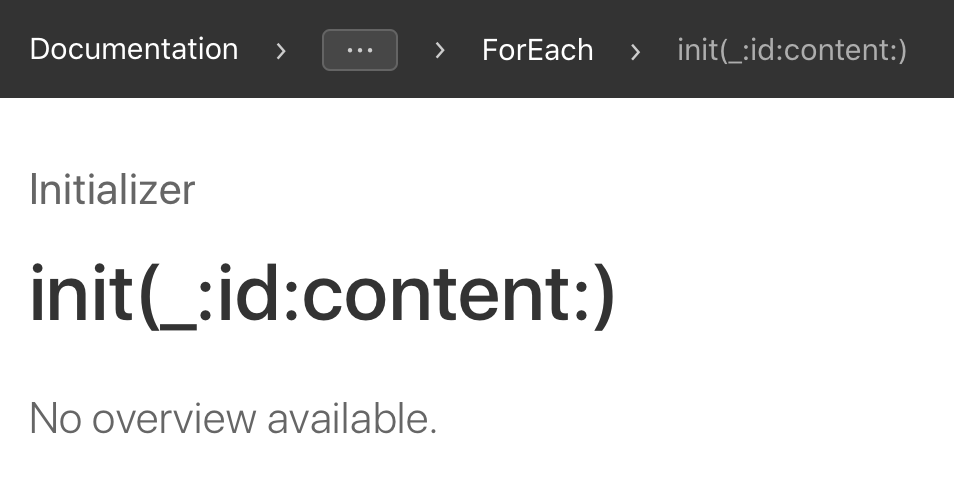
Based on the rather rough state of the SwiftUI documentation for Picker and ForEach,1 I’d assumed that combining the right binding with a .tag(_:) on the items would work:

Form {
    Picker(selection: $selectedItemID, label: Text("Choose Something") {
        ForEach(items){
            Text($0.label).tag($0.value)
        }
    }
    Text("You've selected item \(selectedItemID)!")
}

For reference, the models I’m referring to throughout are pretty simple:

struct CustomModel {
    let value: Int
    let label: String
}

Now this looks like it’s working in simple cases. However, I was trying to interact with a web API, so that items array looked something like this:

var items: CustomModel[] = [
    CustomModel(value: 7, label: "First"),
    CustomModel(value: 3, label: "Second"),
    CustomModel(value: 1, label: "Third")
]

If you tapped “Second” in the picker that SwiftUI generated, however, the text wouldn’t read “You’ve selected item 3!” like it should; it would be “You’ve selected item 1!”
A bit more tinkering revealed that, instead of pulling the value from the .tag(_:) on there, it was just using… the index in the ForEach.2
After some frustrated Googling, utterly despairing of Apple’s documentation, and a lot of StackOverflow searches, I finally figured out the solution:

Form {
    Picker(selection: $selectedItemID, label: Text("Choose Something") {
        ForEach(items, id: \.value){
            Text($0.label).tag($0.value)
        }
    }
    Text("You've selected item \(selectedItemID)!")
}

Quite frankly, I don’t have a good explanation of what’s going on here; last time I was tinkering with Pickers, the .tag(_:) provided SwiftUI with the information it needed to do the binding. (When I’ve got more time, I’d like to do another test — now that I’ve got the id keypath, do I even need the tag?)
I’d love a good explanation of what all the id keypath gets used for, and where else it might be necessary, but alas:


  1. It’s a bit unfair for me to link to No Overview Available when referring to SwiftUI; the coverage is low, but the problem isn’t so much that as the fact that ‘documentation coverage’ just doesn’t work as a metric for something like SwiftUI. The tutorials are a start, and a good sign that Apple was at least trying to rethink their approach to documentation, but they’re not nearly complete enough. 
  2. Zero-based index, of course, which seemed obvious to me, but got me a “???” response when I was complaining about this issue to a non-programmer friend. 
Categories
Programming Technology Tools

Automated Playlist Backup With Swift

I mentioned in my post about scripting with Swift that I’d been working on something that inspired this. Well, here’s what it was: a rewrite of my automated playlist backup AppleScript in Swift. That version ran every hour… ish. Partly that scheduling issue is because launchd doesn’t actually guarantee scheduling, just ‘roughly every n seconds’, and partly it’s because the AppleScript was slow.1
Then I found the iTunesLibrary API docs, such as it is, and thought “well, that’d be a much nicer way to do it.”
And then I remembered that Swift can be used as a scripting language, cracked my knuckles, and got to work. (I also had some lovely reference: I wrote up my very basic intro post, but this post goes further in depth on some of the concepts I touched on.)

https://gist.github.com/grey280/0126ac93df1d52d91e78f52d97805246

Not the best API I’ve ever written, but not bad for something I threw together in a few hours. And I had fun doing it, more so than I did with the AppleScript one.
Oh, and it’s much faster than the AppleScript equivalent: this runs through my ~100 playlists in under a minute. So now I have it run every 15 minutes.2
(The configuration for launchd is about the same, you just replace the /usr/bin/osascript with the path to the Swift file, and make the second argument the full path to the directory where you want your backups going. See the original post for the details.)
I’m a bit tempted to turn this into a macOS app, just so I can play around with SwiftUI on macOS, and make it a bit easier to use. Of course, by ‘a bit tempted’ I mean ‘I already started tinkering,’ but I doubt I’ll have anything to show for a while — near as I can tell, SwiftUI has no equivalent to NSOutlineView as of yet, which makes properly showing the list a challenge. Still, it’s been fun to play with.


  1. I was going to cite this lovely resource, but since that website was built by someone who doesn’t understand the concept of a URL, I can’t link to the relevant section. Click ‘Configuration,’ then the ‘Content’ thing that’s inexplicably sideways on the left side of the screen, and ‘StartInterval’ under ‘When to Start’. 
  2. I’m also looking at the FSEvents API to see how hard it would be to set it up to run whenever Music (née iTunes) updates a playlist, but that… probably won’t happen anytime soon. 
Categories
Programming Technology

Swift Scripting

I’m a bit of a fan of Swift, though I don’t get to tinker with it nearly as much as I’d like. Recently, though, I did some tinkering with Swift as a scripting language, and thought it was pretty fun! (I’m planning another blog post about what, exactly, I was trying to do later, but for now just take it as a given.)
The most important step is to have Swift installed on your machine. As a Mac user, the easiest way is probably just to install Xcode, but if you’re looking for a lighter-weight solution, you can install just the Swift toolchain. Swift is also available for Ubuntu, which, again, takes some doing. If you want Swift on Windows… well, it’s an ongoing project. Personally, I’d say you’ll probably have better luck running it in Ubuntu on the WSL.
Alright, got your Swift installation working? Let’s go.
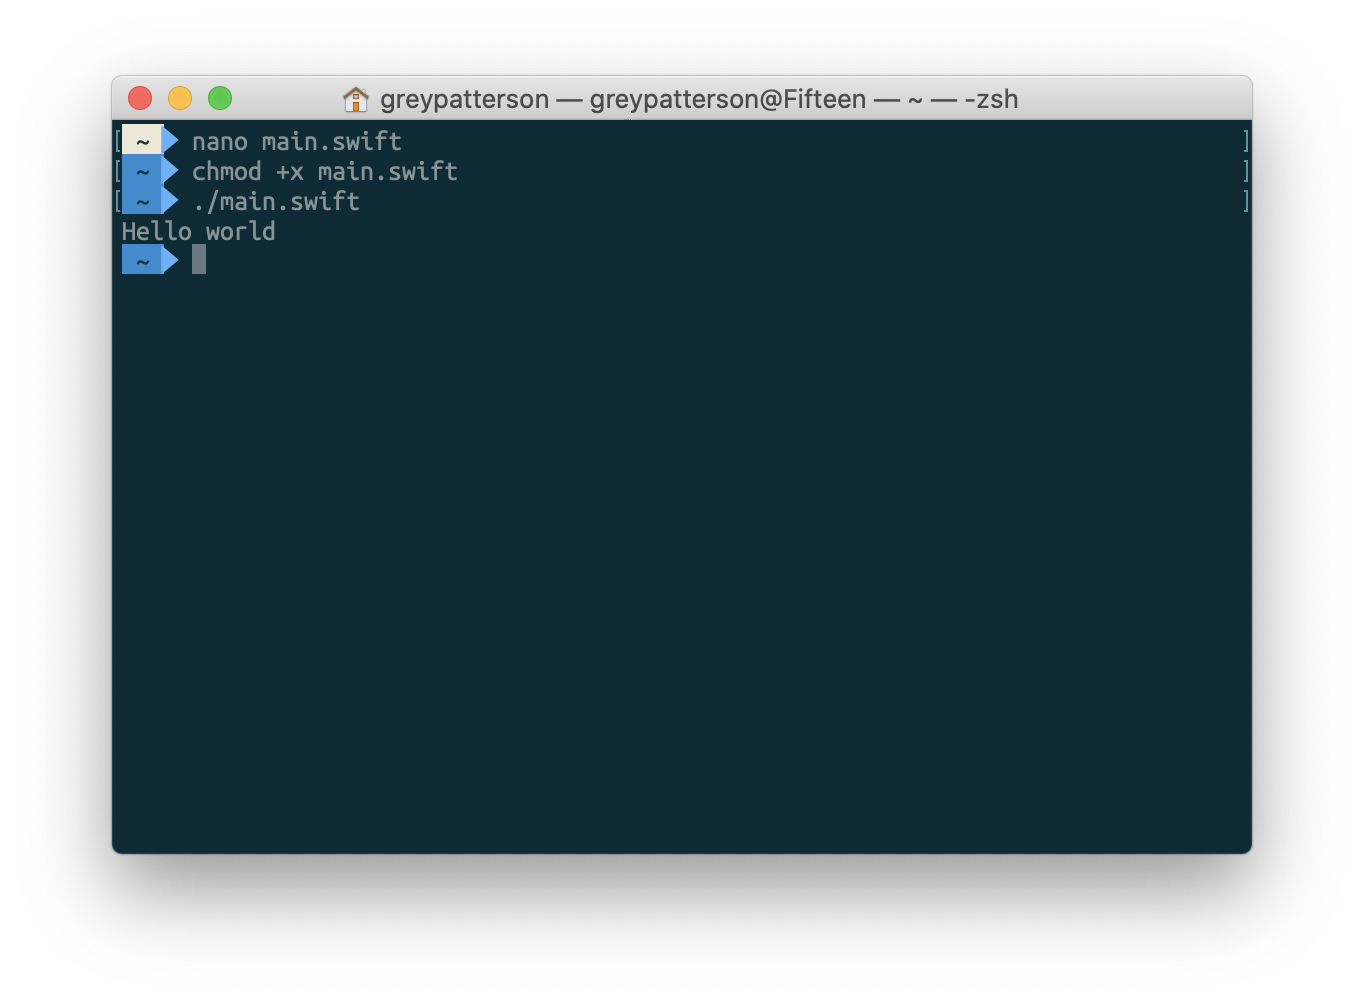
Step 1: Make your Swift file. We’ll call it main.swift, and in true Tech Tutorial fashion, we’ll keep it simple:

print("Hello world!")

Step 2: Insert a Magic Comment in the first line:

#!/usr/env/swift
print("Hello world!")

Step 3: In your shell of choice, make it executable:

$ chmod +x ./main.swift

Step 4: Run!

$ ./main.swift
> Hello world!

No, really, it’s that simple. The magic comment there tells your interpreter ‘run this using Swift’, and then Swift just… executes your code from top to bottom. And it doesn’t have to be just function calls — you can define classes, structs, enums, whatever. Which is the real benefit to using Swift instead of just writing your script in Bash; object-oriented programming and type safety are lovely, lovely things.

My next post is going to go into some of the more interesting stuff you can do, with a lovely worked example, but for now I’ll add a couple other things:

  • By default, execution ends when it gets to the end of the file; at that point, it will exit with code 0, so Bash (or whatever) will assume it worked correctly. If you want to exit earlier, call exit(_:) with the code you want. exit(0) means “done successfully,” while any other integer in there will be treated as an error.1
  • print(_:) outputs to stdout, which can be piped using |. If you want to output an error (to be piped with 2>, or similar) you need to import Foundation, and then call FileHandle.standardError.write(_:).2
  • To explicitly write to stdout, it’s FileHandle.standardOutput.write(_:).

  1. Which is useful if your script is going to be called programmatically. ./main.swift && echo "It worked!" will print “Hello world” and then “It worked!” with exit(0), but just “Hello world” if you add exit(1) to the end of the file. 
  2. And note the types here – this expects Data, not String, so to write a string, you need to convert it by adding .data(using: .utf8)! 
Categories
Programming Technology

Wrapping UserDefaults

UserDefaults, formerly NSUserDefaults, is a pretty handy thing. Simply put, it’s a lightweight way of storing a little bit of data — things on the order of user preferences, though it’s not recommended to throw anything big in there. Think “settings screen,” not “the image cache” or “the database.” It’s all based up on the Defaults system built into macOS and iOS,1 and it’s a delightfully efficient thing, from the docs:

UserDefaults caches the information to avoid having to open the user’s defaults database each time you need a default value. When you set a default value, it’s changed synchronously within your process, and asynchronously to persistent storage and other processes.

How handy is that! All the work of writing to disk, abstracted away just like that. Neat!
Now for the downside: it’s got a very limited range of types it accepts.2 Admittedly, one of these is NSData, but it can be a bit annoying to do all that archiving and unarchiving all the time.
One solution I use is writing a wrapper on UserDefaults. Swift’s computed properties are a very neat way to do it, and any code you write elsewhere in your project will feel neater for it.
The basic idea is this:
[gist https://gist.github.com/grey280/82b91e70ef49e087a0aefe3e9374d2b7 /]
There you go: you’ve got an easy accessor for your stored setting.
Of course, we can make this a lot neater; we’ll start by wrapping it up in a class, and make a couple tweaks while we do that:
[gist https://gist.github.com/grey280/ff61d2f31a0c9f3fc2e3595a55ae9de5 /]
First, we made a variable to point at UserDefaults.standard instead of doing it directly. This isn’t strictly necessary, but it makes things a lot easier to change if you want to switch to a custom UserDefaults suite later.3
Secondly, we pulled the string literal out and put in a variable instead. Again, this is more about code maintainability than anything else, but that’s certainly a good thing to be working for. Personally, I tend to wrap all my keys up in a single struct, so my code looks more like this:
[gist https://gist.github.com/grey280/77bccd85bb1843dbd7360f7e9eecc38a /]
That’s a matter of personal taste, though.
You might also have noticed that I made both the keys and the UserDefaults.standard private — I’ve set myself a policy that any access of UserDefaults that I do should be via this Settings class, and I make it a rule that I’m not allowed to type UserDefaults anywhere else in the app. As an extension of that policy, anything I want to do through UserDefaults should have a wrapper in my Settings class, and so private it is: any time I need a new setting, I write the wrapper.
There are a few more implementation details you can choose, though; in the example above, I made the accessors static, so you can grab them with Settings.storedSetting. That’s a pretty nice and easy way to do it, but there’s a case to be made for requiring Settings to be initialized: that’s a great place to put in proper default values.4
[gist https://gist.github.com/grey280/c067ec6f165e498f4a8e0a01164a74eb /]
In that case, accessing settings could be Settings().storedSetting, or
[gist https://gist.github.com/grey280/0080b5a0cfeb3d56e1140c81eec1edb4 /]
You could also give yourself a Settings singleton, if you like:
[gist https://gist.github.com/grey280/e393bc00557a0c24e407d25dc2b4cecb /]
I don’t have a strong feeling either way; singletons can be quite useful, depending on context. Go with whichever works best for your project.
And finally, the nicest thing about writing this wrapper: you can save yourself a great deal of repeated code.
[gist https://gist.github.com/grey280/2395469f039d96ba1e4d3558a74a839f /]
Or, if you don’t want to have a default return, make it optional, it’s not much of a change:
[gist https://gist.github.com/grey280/c03eb527f9ec5d7fb15d519563085875 /]
You can also do similar things with constructing custom classes from multiple stored values, or whatever else you need; mix and match to fit your project.
(Thoughts? Leave a comment!)


  1. If you’ve ever run defaults write from the Terminal, that’s what we’re talking about. 
  2. If it matters, it’s also not synced; the defaults database gets backed up via iCloud, but if you want syncing, Apple recommends you take a look at NSUbiquitousKeyValueStore
  3. If you want your preferences shared between your app and its widget(s), or between multiple apps, you need to create a custom suite; each app has its own sandboxed set of defaults, which is what UserDefaults.standard connects to. 
  4. UserDefaults provides default values, depending on types, but they may not be the same defaults that you want. If you want a stored NSNumber to default to something other than 0, you’ll need to do that initial setup somewhere. 
Categories
Technology

iOS Notification Routing

The other day I was thinking about the way iOS handles notifications; the new Do Not Disturb stuff in iOS 12 is a good start, but it’s still rather lacking. It’s a fun thought exercise: say you’re Jony Ive or whoever, and you’re setting out to redesign the way that notifications work, from a user standpoint.1 How do you make something that offers advanced users more power… but doesn’t confuse the heck out of the majority of your user base?
After a while dancing around the problem, I came to the conclusion that you don’t.23
Instead, imagine something more along the lines of Safari Content Blockers. By default, the existing system stays in place, but create an API that developers can use to implement notification routing, and allow users to download and install those applications as they so desire.4
Obviously, this would have some serious privacy implications — an app that can see all your notifications? But hey, we’re Jony Ive, and Apple has absolute control over the App Store. New policy: Notification routing apps can’t touch the network.5 And, to prevent any conflict of interest stuff, let’s just say that the routing apps aren’t allowed to post notifications at all.
Alright, we’ve hand-waved our way past deciding to do this, so let’s take a look at how to do it, shall we?
Let’s start with the way notifications currently work. From UNNotificationContent we can grab the properties of a notification:
[gist https://gist.github.com/grey280/f12f2abe57826f2b3efdc30cebc3d834 /]
For proper routing, we’ll probably want to know the app sending the notification, so let’s add the Bundle ID in there, and we’ll also give ourself a way to see if it’s a remote notification or local.
[gist https://gist.github.com/grey280/d60ea7481dd312bd6f4e7d6ad3e4ae4a /]
Alright, seems nice enough.6
Next up, what options do we want to have available?
1. Should the notification make a sound?7
2. Should the notification vibrate the phone?
3. Should the notification pop up an alert, banner, or not at all?
4. If the user has an Apple Watch, should the notification go to the Watch, or just the phone?
5. Should the notifications show up on the lock screen, or just notification center?
6. Finally, a new addition, borrowing a bit from Android: which group of notifications should the notification go into?8

Alright, that should be enough to work with, let’s write some code.
[gist https://gist.github.com/grey280/8dac8866a736c886a66079ff58b9d34b /]
Not a complex object, really, and still communicating a lot of information. I decided to make the ‘group’ aspect an optional string — define your own groupings as you’d like, and the system would put notifications together when the string matches; the string itself could be the notification heading.9
And with that designed, the actual routing could just be handled by a single function that an application provides:
[gist https://gist.github.com/grey280/309a5f459dc207542c4f98c27bcd0c2c /]
And with that, I’d be free to make my horrifying spaghetti-graph system for routing notifications, and the rest of the world could make actually sensible systems for it.
Thoughts? There’s a comment box below, I’d love feedback.


  1. I haven’t done much work with the UserNotification framework, so I’m not going to be commenting on that at all. 
  2. I spent a while mentally sketching out a graph-based system, somewhere between Shortcuts and the pseudo-cable-routing stuff out of Max/MSP, but realized pretty quickly that that’d be incredibly confusing to anyone other than me, and would also look very out of place in the Settings app. 
  3. As a side concept, imagine that but implemented in ARKit. “Now where did I put the input from Messages? Oh, shoot, it’s in the other room.” 
  4. Unlike Safari Content Blockers, though, I think this system would work best as a “select one” system, instead of “as many as you like, they work together!” thing. Mostly because the logistics of multiple routing engines put you back in the original mess of trying to design data-flow diagrams, and users don’t want to do that. Usually. 
  5. I’d call this less of an ‘App Store’ policy and more of a specific entitlement type; if you use the ‘NotificationRouting’ entitlement in your app, any attempt to access the network immediately kills the application. 
  6. Of course, those last two additions wouldn’t be things that you’d be able to set while building a UNNotificationContent object yourself, so perhaps we should be writing this as our own class; UNUserNotification perhaps? 
  7. We’ll assume that setting notification sounds is handled somewhere else in the system, not by our new routing setup. 
  8. This would be at a higher level than iOS 12’s new grouped notifications (the stacks), more like the notification channels in Android: categories like ‘Work’, ‘Family’, ‘Health’, and so on. 
  9. Since we’re Jony Ive, and everything has to be beautiful, we’re presumably running it through some sort of text normalization filter so people don’t have stuff going under the heading “WOrk” 
Categories
App Portfolio Technology

Open-sourcing Variations

Now that the whole concert is over, and I’ve finished going through approximately all of the WWDC sessions, I’ve decided that Variations won’t be receiving any further development — it wasn’t going to be enough of a priority for me to do it any justice, and I’d hate to half-ass it.1 The app will remain on the App Store, for now, though if it breaks in future iOS versions, I’ll probably pull it entirely. Instead, I’m releasing the source code, as-is; if you’d like to look through it, it’s right here.
I had fun building it, and I like to think that it does some interesting things with the implementations under the hood, so hopefully somebody can find some use from it.


  1. This is, hopefully, a hint about some of my other projects that are a higher priority; announcements of those will, of course, show up on this here blog.